
University Video Library
The Marketing Office has compiled a collection of video clips for the university community to source when creating video productions.
The mood and tone conveyed by our videography should be personal, authentic and bold. Our style aims to engage and captivate the viewer with honest, relatable subjects, settings and action. We emphasize visual documentary storytelling over staged, posed videos.
- Use a video style that captures St. Edward’s authentically — focus on moments happening in real time rather than staging a moment, if possible.
- As you record video, be mindful of the platform you will be sharing on (website, YouTube, Instagram, etc.) so as to capture the appropriate viewing orientations and type of content.
- Use behind-the-scenes footage to break down the fourth wall in order to engage viewers and make them a part of the video experience.
- When possible, videos should be unscripted and tell stories. If featuring a particular person or group, come prepared with interview questions to get the conversation and storytelling going.
- Employ visual storytelling through b-roll to advance the narrative and communicate the story and message.
- B-roll footage is often filmed after the main interview is recorded and provides supporting scenes for what was said by the interview subject.
- B-roll may include establishing clips to show location, detail clips to give context, clips of the person interviewed doing something active, etc.
- Video length should be a minimum of 10 seconds and a maximum of two minutes, with most videos falling between 30 seconds to one minute.
Hiring a Freelancer
If you would like to hire a freelancer to capture your event or produce a video, the Marketing Office has complied this list of videographers from which you can choose.
Video Release
Please use this online form to obtain consent from subjects when taking photo or video for university purposes. For guidelines on the consent of usage, please see the Photo/Video Release Statement.
Video Graphic Styles
It is important that our university follow the photo and video guidelines to ensure that we are aligned with the brand. Video should adhere to colors and fonts that match the St. Edward’s University brand. Text sizes should be proportionate and colors should provide contrast for legibility.
Using Graphics
For most videos, the rule of thumb will be to use Deep Eddy (blue) as your primary color and Hike and Bike (yellow) as your secondary color. For titles, please use Marr Sans semibold and Marr Sans regular for subtitles. If these fonts are unavailable, the university's alternate sans serif font should be used, Helvetica LT Std.
Open: Title should appear one to two seconds into the video. The title should be Marr Sans Semibold and can range between 80–100 pt., depending on length of the title. The subtitle should be Marr Sans Regular and should be 50 pt. The title and subtitle can either have a black drop shadow or not, depending on style preference.


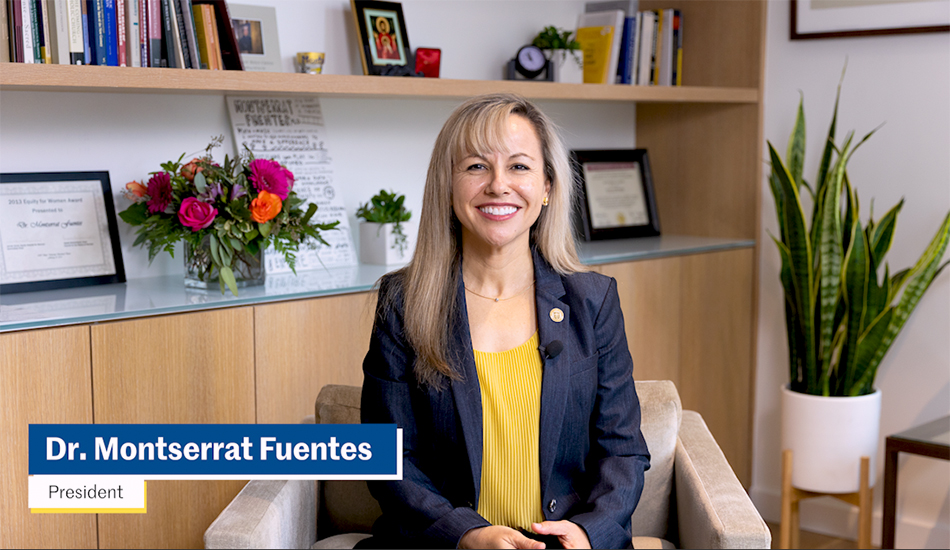
Lower Third: Lower thirds should be placed in the lower right-hand or left-hand corner of the video within the title safe area. The person's name should be Marr Sans Semibold sized 70 pt. and the person's title should be Marr Sans regular sized 35 pt. The person's name can either have a black drop shadow or not, depending on style preference. The person's title should not have a drop shadow. Use your judgment on if the person's title is too long and allow it to be two lines if necessary.
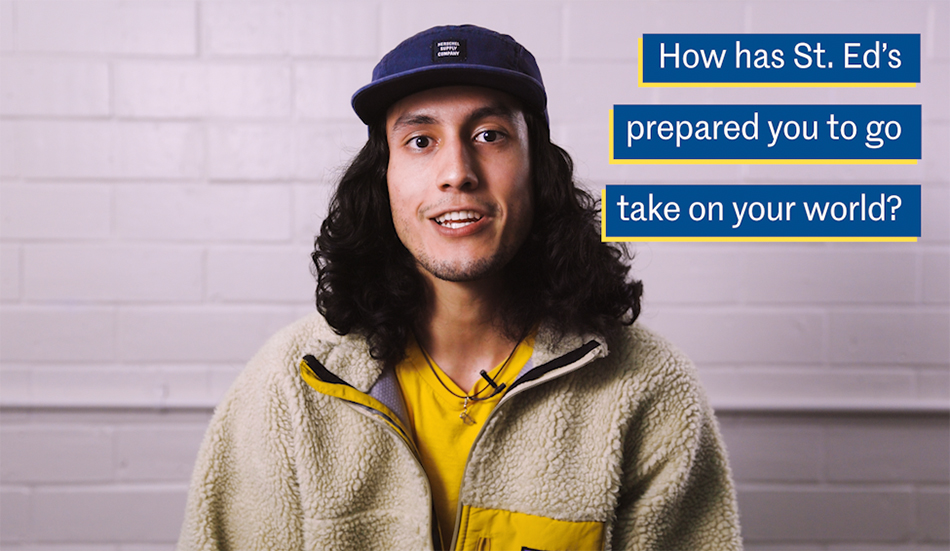
Side Bar: A side bar can slide in from the left or right side. The side bar should be sized 70 pt. and can either be Marr Sans Semibold or Marr Sans Regular. The side bar can either have a black drop shadow or not, depending on style preference.
Close: The video should close with the university logo slide followed by a CTA (call-to-action) slide if applicable. (A social tag or web address, for example.) The CTA should be Hike and Bike yellow for distinction and should be centered below the St. Edward's logo. The CTA should be 50 pt. and will typically be Marr Sans Semibold but can also be Marr Sans Regular.

Recording on Your Phone
Optimize your settings.
- For iPhone:
- Open Settings
- Select Camera
- Select 4K at 30 fps under Record Video (or highest resolution)
- Make sure Auto Low Light FPS is turned off
- For Android:
- Open Camera
- Select Video
- Select Settings in the top left corner
- Under Rear Video Size
- Select 16:9
- Under 16:9, select UHD 3840 x 2160 (or highest resolution)
- Under Video Stabilization
- Turn On
- Under Rear Video Size
Make sure your phone is well charged so it doesn't die while recording.
Use the rear-facing/back camera to record video.
- Your rear-facing back camera is the camera on the back side of your phone, AKA not the camera on your display screen. Your back camera will produce higher quality video so please use this instead of the front camera. If your display is showing your face, you are on the front camera. Press the flip camera button to switch to the rear-facing camera
Clean your lens and make sure it's free of smudges.
Use a tripod or something sturdy to prop your phone up and keep it stable.
Lock exposure and focus.
- If you are able to have someone assist you with your video, sit where you are planning to record your video and have a person tap your face on the phone screen so that the exposure and focus will stay consistent throughout the recording.
Take horizontal video and don't zoom in.
- Digital zoom on your phone reduces image quality, so don't try to zoom in.
Use natural light and face towards it, not away from it.
- Window light is soft and looks great on video. If possible, film your video near a window and let the window light light your face. If a window is not available, try to have a lamp or other light source on in front of you to light your face. You do not want windows or lights behind you as they can backlight you and cause you to be silhouetted.
Record in a quiet place.
- It will likely be better to record inside in a room that does not have a lot of echo so that your audio will be clearer. Situate yourself close to the camera (about waist up or closer) so that your audio records at a good volume. Do not record outside if it's windy or you are in an area that has a lot of road traffic. Recording outside may work if it's a still day in a quiet backyard.
Recording on Zoom
First, make sure you're using the desktop version of Zoom (not through your browser). If you don't have the application locally on your hard drive, go to Zoom's website and download the program. Once you have it installed, open it and go to Settings (top right gear icon) to optimize your settings.
Step 1: Optimize settings
- Click settings (top right gear icon) from your Zoom home window.
- Select Video.
- Make sure “16:9 (Widescreen)” is selected under camera settings.
- Make sure “Mirror my video” is selected under My Video settings.
- Check "Enable HD."
- Uncheck "Always display participant name on their videos."
- Under “Local Recording,” select a folder on your computer where you would like to access your recording once it’s complete (Zoom recommends you keep this set as the default folder).
- Check “Optimize for 3rd party video editor” on the same screen.
- Uncheck "Add a timestamp to the recording."
- Make sure you have chosen the options for Local Recording. Do not save your video as a Cloud Recording, as the resolution of the recording will be low.
Step 2: Prepare your computer and filming space
- Make sure your laptop is fully charged or plugged in so it doesn’t die while recording.
- Clean your computer screen, especially your webcam — make sure it’s free of smudges!
- Elevate your laptop or desktop so that you are not looking down at your screen. You want your webcam to be level with or slightly above your eyes.
- Please do not use a Zoom virtual background. They are fun for meetings but very glitchy with recordings. Be mindful of your real-life background and make sure it’s clean/not busy.
- Use natural light and face toward it, not away from it.
- Wear an outfit typically of what you would wear to work. Avoid black and white (or a color that would blend too much into your background). The most important thing is that it’s authentic to your professional role and life.
- Window light is soft and looks great on video. If possible, film your video near a window and let the window light your face. If a window is not available, try to have a lamp or other light source on in front of you to light your face. You do not want windows or lights on behind you as they can backlight you and cause you to be silhouetted.
- Choose a quiet place indoors. Situate yourself close to the camera (about waist up or closer) so that your audio records at a good volume.
- If you are reading from a script, position that document as close as possible to your camera.
Step 3: Test your setup and WiFi with Marketing
- Schedule a 15-minute consultation with a partner in Marketing via Zoom before you record. We’ll ensure you’re positioned correctly and that your internet connection won’t present audio syncing challenges. This step should ensure that you won’t need to redo your video!
Step 4: Record
- Please aim to keep your video message under 3 minutes in length.
- Start a Zoom meeting as the host.
- Click the option to Record. If there is a menu, select Record on this Computer.
- Once you are done recording your message, end the meeting. This will signal Zoom to automatically convert the recording so you can access your files on your desktop.
- Once the conversion process is complete, the folder containing the recording files will open. Note: If the meeting unexpectedly shuts down or if the conversion process is interrupted, the recording files could become corrupted and non-recoverable. Restarting or shutting down your computer, putting the hard drive to sleep or closing your laptop will interrupt the conversion process.
- Rename your file in this format: FirstName_LastName_Project.
Step 5: Send Marketing your video (if requested)
- Do not edit your recorded video.
- Please place your video on Drive or Box, and send the link.
Additional references on this subject can be found in Box.
Recording a Voiceover
For high-quality, professional voiceover, book and use the Whisper Room (LIBR 246C Audio Booth) in the Munday Library through 25Live. Email Instructional Technologist Michael Bell at mikekb@stedwards.edu if you have questions about how to use the equipment and computer programs.
Great video voice-over audio comprises several elements:
- Audio clarity and volume: Make sure your recording isn't too low or loud. Do some test recordings (a few sentences works) and try to find somewhere in the middle. Record in a quiet place with no distractions. Be mindful of the sounds of your cooling system (you may want to shut down your AC for the duration of your recording) as well as outside traffic sounds. Recording in your car or closet can work surprisingly well. A great tip to try is using your recording device under a fluffy blanket. It sounds silly but it can make a big difference!
- Pacing: The best voice overs have a natural and deliberate pace. Practice your script a few times before you record to help you speak at a more natural pace.
- Vocal tone and inflection: Speak in a natural and pleasant manner. Voice overs should be friendly, engaging and avoid a monotone pace. Smiling while you're running through the script can help improve tone.
- Pronunciation: Speak naturally and clearly. Run through the script several times. Even though you'll be reading, it's helps to get accustomed to speaking what you will say.
Do a test recording: Record a few sentences and listen to the playback with your headphones rather than a laptop. Place the mic 6–8 inches from your mouth and adjust the position as necessary.
Recording: You can aim for an error-free recording, but it's not necessary to stop and redo the entire thing if you mess up. Fixes can be made with editing. Just go back a sentence or two in your script and start again. Tip: If you clap loudly at a spot where you make a mistake, you’ll be able to find it easier in the audio editor when you go back to fix it.
Saving: Save your audio files to a Drive folder, if requested by Marketing. Please give them a descriptive name based on the content of the recording. If you want to edit your audio files, try using a program like Audacity or an iPhone app. Or feel free to send the raw files and we can take care of the editing.
Additional references on this subject can be found in Box.
Technical Tips
Video
Format: H.264
- H.264 is an industry standard for video compression, the process of converting digital video into a format that takes up less capacity when it is stored or transmitted.
Dimensions: 1920 x 1080 px
- These dimensions will give you a standard size for horizontal video. Flipping the dimensions will give you the standard size for vertical video.
Frames Rate: 29.97 fps
- Frame rate (expressed in frames per second or FPS) is the frequency (rate) at which consecutive images called frames appear on a display.
Field Order: Progressive
- Field order refers to the order in which each pair of video fields is recorded. Progressive video displays consecutive video frames and results in better, smoother, fast sequences, providing fluidity and sharpness to the video.
Pixel Aspect Ratio: Square Pixels (1.0)
- Pixel Aspect Ratio describes squareness or non-squareness and is expressed as a fraction of a horizontal (x) pixel size divided by a vertical (y) pixel size. The pixel aspect ratio for square pixels is 1/1.
TV Standard: NTSC
- NTSC is the color encoding system used by DVD players and until recently, by broadcast TV. Modern TVs don’t strictly use NTSC format anymore, but the timing and type of signal used carries over, so the format is still called NTSC.
Audio
Format: AAC
- Advanced Audio Coding (AAC) is an audio coding standard for lossy digital audio compression.
Sample Rate: 48000 Hz
- Sample rate is how fast samples are taken. It's measured in samples per second and is usually expressed in kiloHertz (kHz), a unit meaning 1,000 times per second.
Channels: Stereo
- A stereo sound is a method of sound reproduction that creates an illusion of multi-directional audible perspective by using more than one channel.
Bitrate: 320 kbps
- Bitrate refers to the number of bits — or the amount of data — that are processed over a certain amount of time. In audio, this usually means kilobits per second.